Friday, May 31, 2013

Apple Layout


Sometimes I get in such a rut when I try to think of layout ideas.  Thank goodness for all the Pinterest inspiration.  This layout, however, came to mind really quickly and came out just like I wanted!     
The apple comes from Create-a-Critter.  I used my gypsy to plan out how I wanted it and to see how big my apple needed to be and hid the facial features.  I ended up sizing the apple at 12.09 in. The photo mat for my pictures is 7 5/8 by 8 1/8. 
Supplies:
Create-a-Critter-Apple cut at 12.09 in.
Type Candy Font Cartridge-letters cut at 1.75 in.
Recollections cardstock and patterned paper
brown chalk
white gel pen
button
Stamp-Scrappy Moms-Picture Perfect set

Overall, it was a super quick and simple layout to create.  I love it when that happens!

Wednesday, May 8, 2013

Monogrammed Cards


Guess what!  Michael's has Chevron Recollections cardstock paper packs!  I was so excited when I saw this the other day.  I couldn't wait to use it!  
I love anything monogrammed, so I wanted to make some cute monogrammed card sets.

I made these note cards as gifts on Supply Day for Teacher Appreciation Week.  I kept them pretty simple since I had to make about 15.  I made a set of five per teacher with five A2 size envelopes.


The font and scalloped oval came from the Storybook cartridge.  


I really had a trouble deciding whether to keep the colors the same or mix them up.  Making decisions is not my strong point, especially when it comes to colors and picking out paper!  In the end, I went with a monochromatic look and included one of each color per set.


Supplies:  
Storybook cartridge for scalloped oval and letters
Recollections cardstock
Coredinations cardstock
Baker's Twine
A2 envelopes
chalk
pop dots

Side note:  As I was making these last Friday morning, I was listening to Kathie Lee and Hoda on TV talking about how every Southern gal loves everything monogrammed and I thought, how ironic, yes we do!


Wednesday, May 1, 2013

Teacher Appreciation Vinyl Projects


I did it!!  I finally created a vinyl project!  I've had rolls of vinyl for two years, and I have never gotten around to creating anything with it.  Shame on me because it was the easiest project I've ever done!  I was so nervous and I watched a lot of tutorials.  Not only was it easy, but it was fast! 


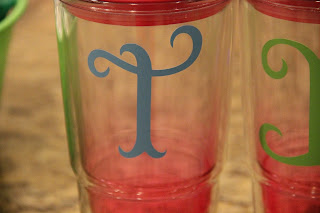
This is what I'm doing for my kids' teachers.    I found the cups at Walmart and the buckets at Dollar Tree.  The clipboards were recently picked up from Office Depot.  As a former teacher, I know teachers love little personalized gifts like these!  See below for specific sizes and cartridges used.


For the clipboards:
I started by welding their names with my Gypsy.  I used Lyrical Letters.  It has the cutest fonts!

This is what it looked like after weeding (peeling) off the vinyl.  


Peel backing off transfer tape.

Place transfer tape sticky side down.  Now you need to burnish it to get it to stick to the transfer tape.  I used my bone folder,  but you could use a credit card too.  

Now peel it making sure it is sticking to the transfer tape.  If it doesn't stick, just burnish it some more.

It will be backwards.

Place it where you want it.  I went ahead and used my bone folder to make sure there were no air bubbles before I peeled off the transfer tape.

For the cups:


I used a couple of different cartridges for these fonts on the cups.


Storybook cartridge for the "B" and "T"
Beautiful fonts!!
"B" cut at 3.94 in.


"T" cut at 3.82 in.


Gypsy Font for the "M"
Another great font!!
Cut at 3 in.


This was the Lyrical Letters -Loop Dee Loo font cut at 4.79 in.


Overall, this was a super easy project!  I can't wait to do some more vinyl creations!

Here are some of the Teacher Gifts I made last year: